Best Day Ever Drops Funny Hard Candy Drops Metal Tin
How to make hard candy jewels
by: Chica
This post may contain affiliate links and we may be compensated if you make a purchase after clicking them.

Jo and I have been doing lots of projects over the last month or so for Little Jo's birthday party, and I want to show you one of the projects I did for part of the party decor. We found ourselves needing some round gems in just the right color of teal. If they could be edible, all the better. So I did some shopping and some research and came up with everything I needed to make hard candy jewels. And I gotta tell you, this turned out to be one of the most fun projects I've done in ages!
By the way, there was a lot of trial and error as I figured out just the right techniques for making hard candy, and I'll tell you about my mistakes at the end, but for now, here is the right way to do it!
Supplies needed to make hard candy
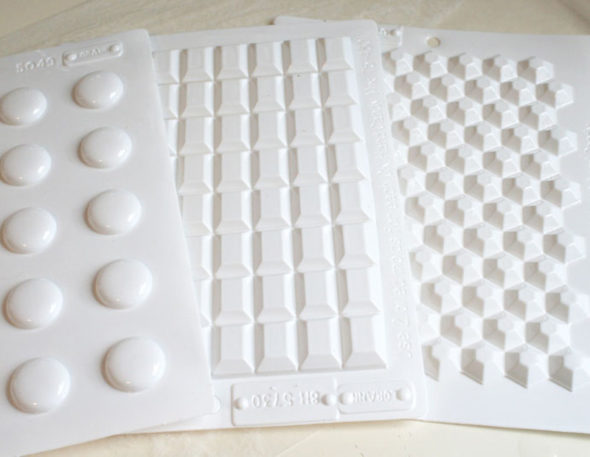
You'll need to pick up a couple of custom supplies for making hard candy. First, you'll need some hard candy molds, designed specifically for use with hard candy.
Do not use chocolate molds, cheap plastic, or anything that's not made to withstand the high temperature of the sugar syrup. It's worth it to buy proper hard candy molds.
You'll also want some liquid food coloring that specifically states that it will work with hard candy. And if you want to flavor your candies, grab some hard candy flavoring oils too.
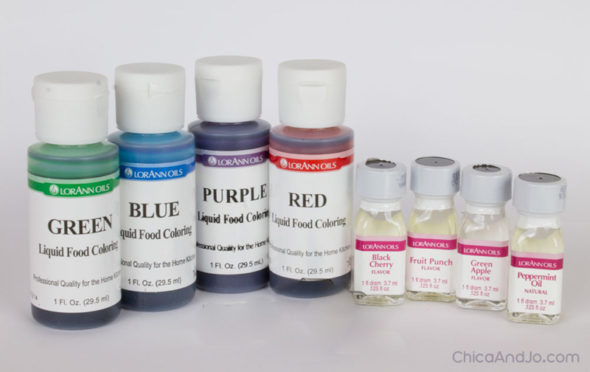
The rest of the items you'll need are quite simple: corn syrup, sugar, water, a pan, non-stick cooking spray, a candy thermometer, and a Pyrex 4-cup glass measuring cup.
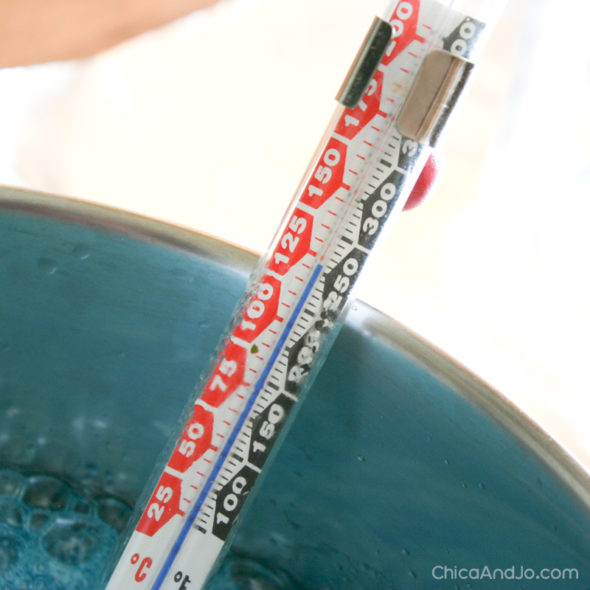
Calibrating your candy thermometer
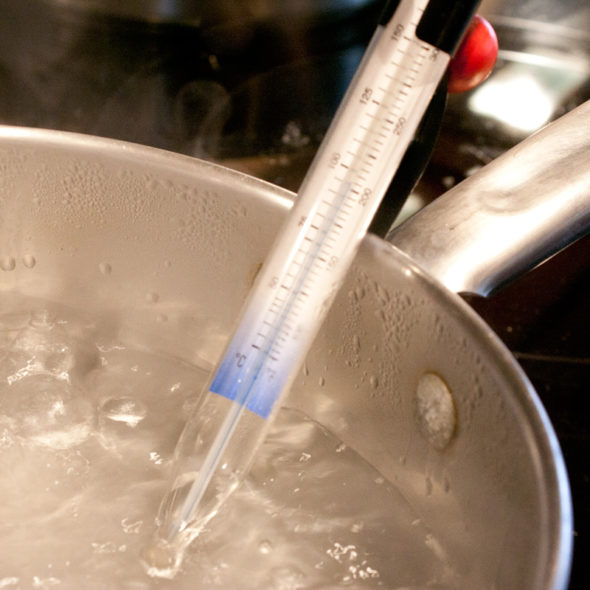
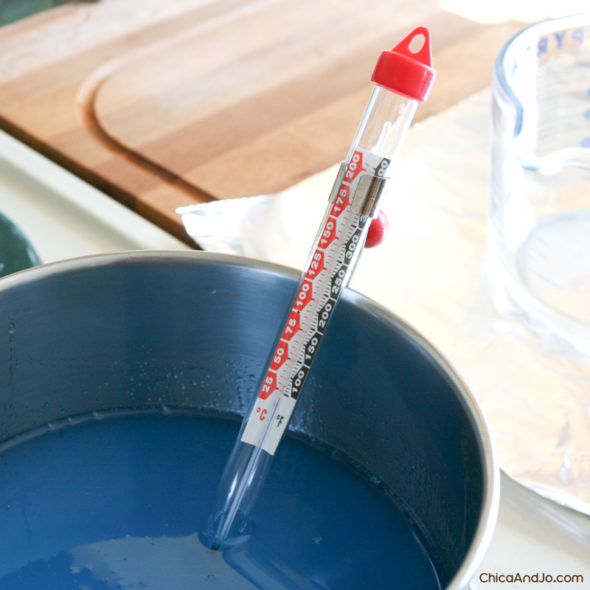
The very first step to candy making, before you do anything else, is to calibrate your candy thermometer. You may not know that your thermometer can get "off" over time, especially the ones with the little paper gauge inside that can move. If your numbers are off, you'll never get the right temperature, and your candy might fail miserably.
Fortunately, it's very easy to calibrate your candy thermometer. Just bring a pot of water to a boil and put the thermometer inside. It should read 212 degrees F (at sea level, anyway). If it's higher or lower than that, then remember that difference and adjust your target temperature accordingly for this candy recipe. (For example: if your thermometer says 200 when the water is boiling, you're 12 degrees too low, and you should subtract 12 from your recipe's target temperature.)
I urge you, please, do not skip this calibration step, because it can save you so much frustration. I learned this the hard way (as you'll see below) with candy that was overcooked and discolored!
Preparing the hard candy molds
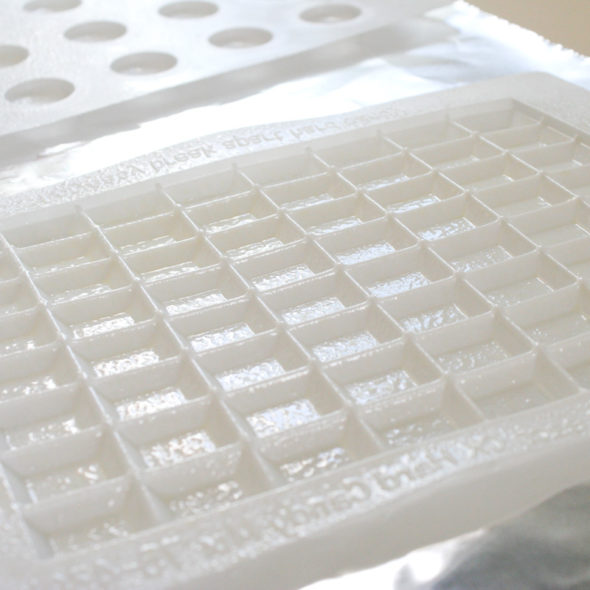
Once your thermometer is calibrated, then you need to spray the hard candy molds with non-stick cooking spray. I place my molds in the sink to keep from spraying my counters.
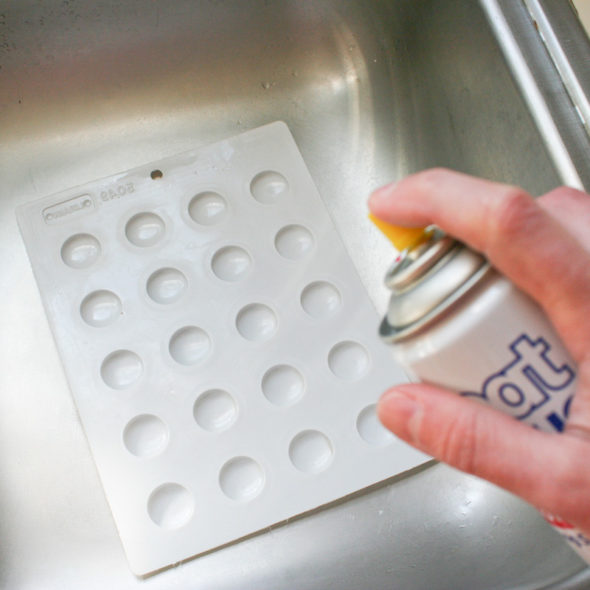
Don't be too stingy, but don't let it puddle, either.
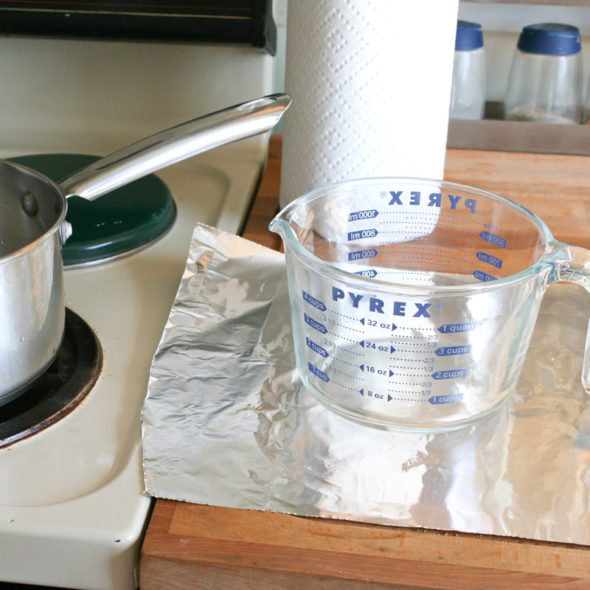
Preparing your work surface for candy making
Next, you want to cover your work area with aluminum foil. The candy won't stick to the foil, so it's a great surface to work on. Put a piece of aluminum foil on the counter next to your stove, making sure it's close enough to catch any candy drips later. Put the Pyrex measuring cup right on the foil.
Then put another big piece of foil on the counter and put your molds on top.
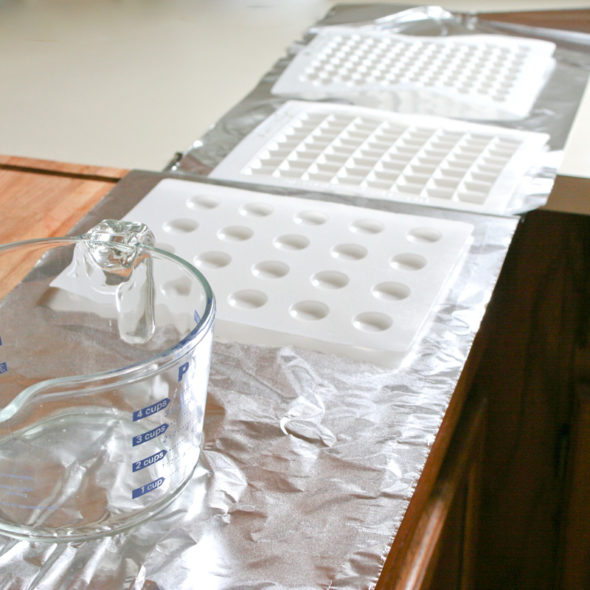
If you're going to use flavoring, put a clean spoon next to the Pyrex cup so it's ready.
Mixing the hard candy ingredients
Now go ahead and mix up your ingredients in the pan. You'll need:
- 2 cups granulated white sugar
- 2/3 cup light corn syrup
- 3/4 cup water
- hard candy food coloring as desired (I used 20 drops)
- 3/4 tsp (1 dram) of hard candy flavoring oils (optional, and to taste)
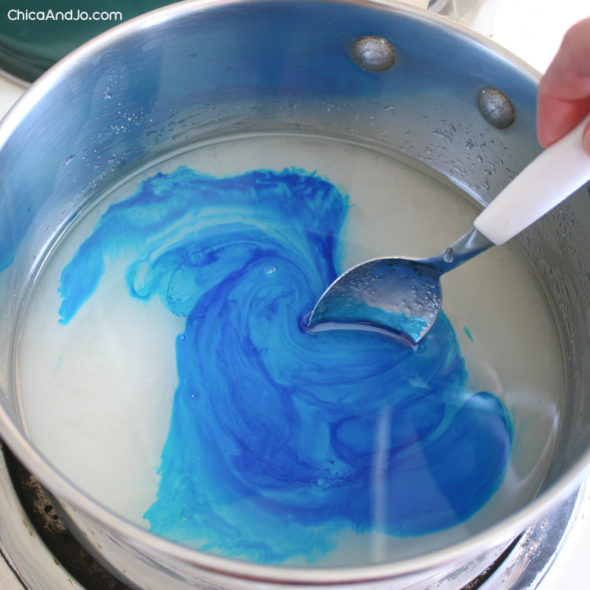
Stir together everything except the flavoring oil so that it is mixed well and the color is uniform. UPDATE - I recently read that adding the coloring too early in the cooking process can make your candy turn out sticky (because the acid in the coloring will invert the sucrose), so despite what these pictures show, you may want to wait and add the coloring at the last minute with the flavoring.
Then clip your candy thermometer to the pan, making sure it does not touch the bottom of the pan.
Cooking the hard candy syrup
Okay, all set? Everything greased and covered and set up and ready to go? Turn the burner on high and get it going. By the way, do not leave this unattended. Stay put!
When the mixture first starts to boil, the temperature will rise to 212 really fast, and there will be lots of steam as the water boils away.
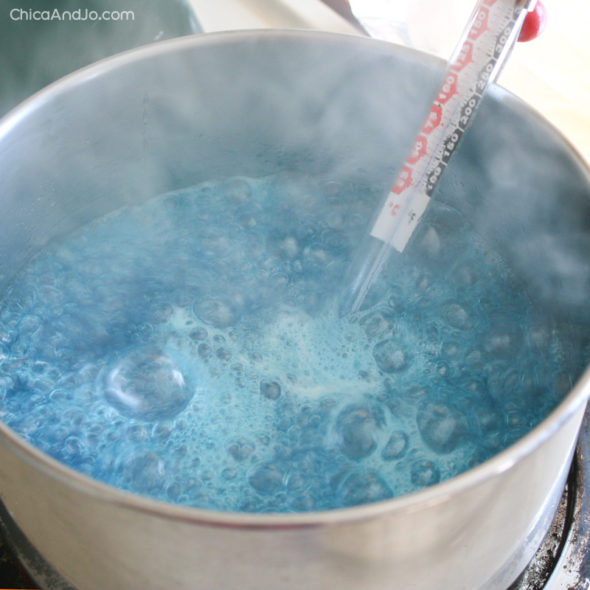
If your thermometer is anything like mine, it will be covered with condensation and hard to read. That's okay, though... and you'll see why in a sec...
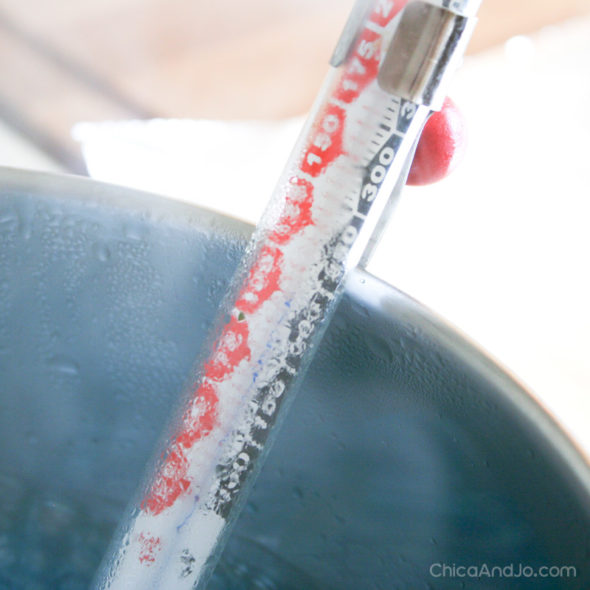
As it continues to boil, you'll see the the temperature rises much more slowly now. (Don't use that as an excuse to leave, though... please stay and watch it for your safety!)
You'll also notice that the steam dies down as the water goes away, and soon there is no steam at all. You'll also notice that your thermometer is suddenly dry and easy to read. Awesome!
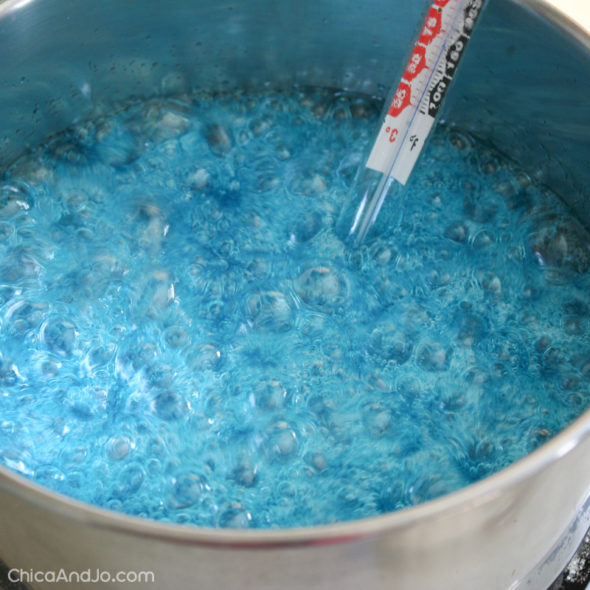
Now this part is critical, so pay attention. Let the sugar boil to 300 degrees F but not a bit more! (I'll explain why at the end of this post). The minute you hit 300, take the thermometer out and set it on the foil (aren't you glad you had that ready?). Then immediately dump the boiling sugar into the Pyrex cup. We do this for two reasons. First, it's easier to pour from the spout. Second, we want to stop the cooking process, so we need to get that liquid out of that hot pan or else it will keep cooking.
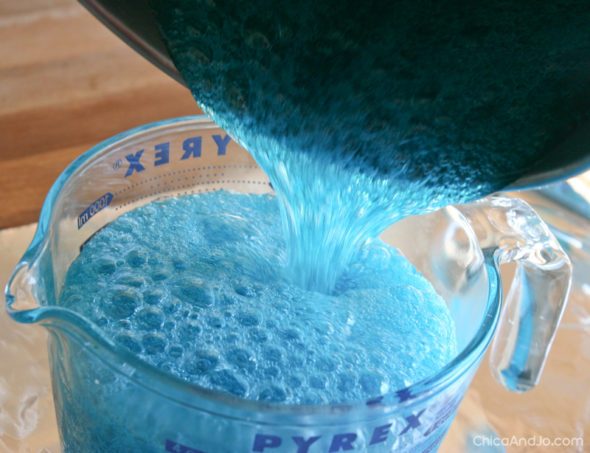
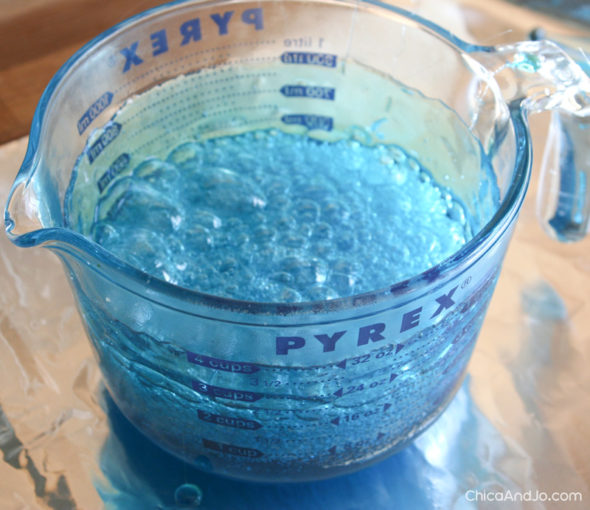
CAUTION: This sugar syrup is VERY hot, so make sure your measuring cup is made of something heat-proof like glass Pyrex. Make sure the container is not cold, or else you'll risk cracking it from the extreme temperature change. Also make sure it's at least the 4-cup size so that you have enough room for the bubbling liquid.
At this point, you can add your optional flavoring oil (and coloring, if you didn't add it already), and stir it in quickly (but carefully!) with the spoon you had ready.
Pouring the candy syrup into molds
Now you've got to work pretty fast to pour the sugar into the molds before it hardens. You'll have a few minutes of working time, so don't trip over yourself to rush, but don't waste time either. The candy syrup will be very easy to pour for about 5 or 6 minutes, and then will start to thicken up. After 8 or 9 minutes, it'll be too thick to pour and you'll be done.
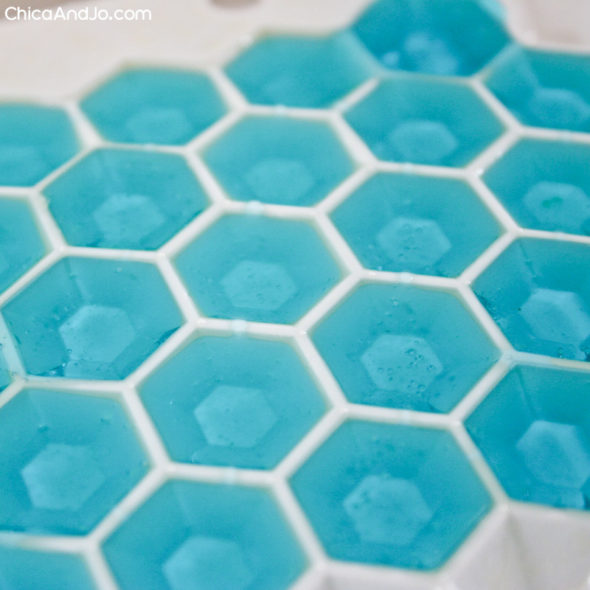
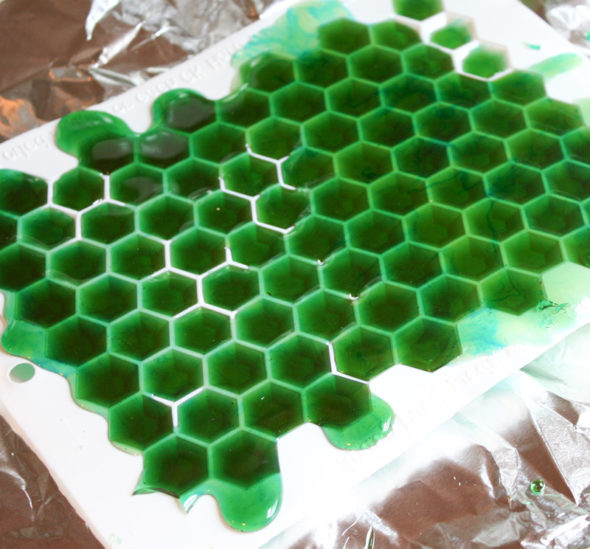
Just pour the sugar slowly and carefully into the molds, taking care not to overfill them.
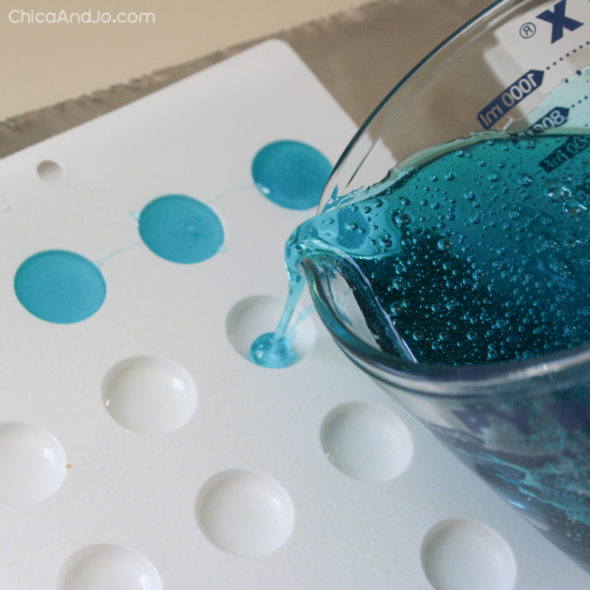
Small drizzles are okay (and pretty much unavoidable!) but do your absolute best to not leave huge puddles or large trails of sugar between the pieces. Once they harden, large drizzles will be nearly impossible to remove without damaging the candies.
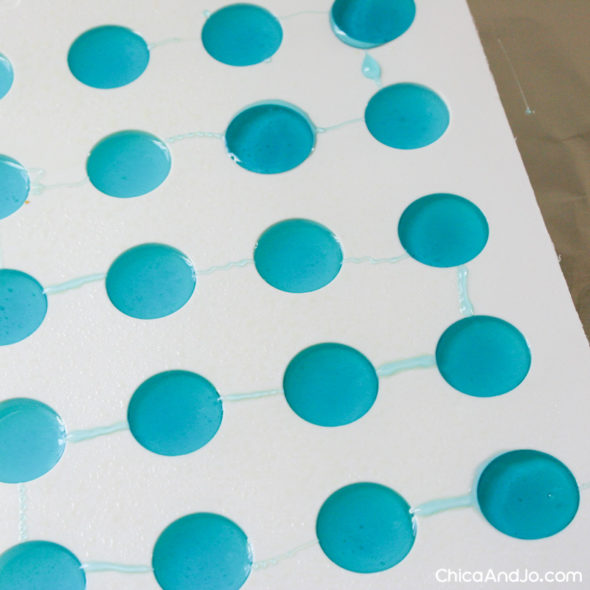
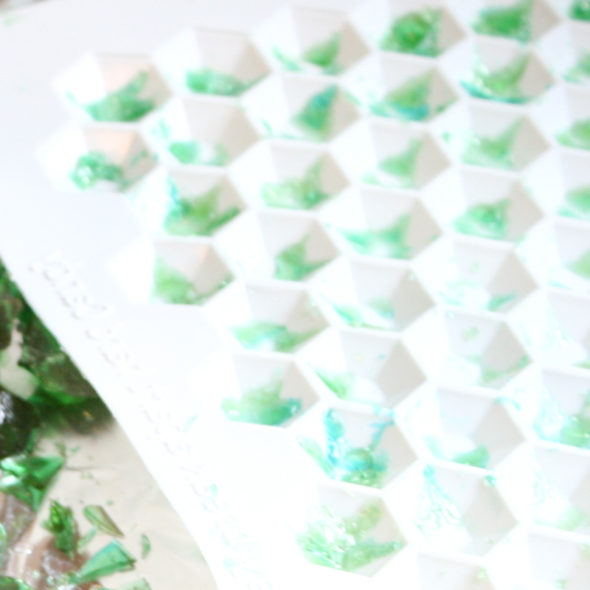
If you use the so-called "breakaway" molds (those with the pieces right up against each other), you need to be really careful not to overfill them. Despite what the name implies, the candy does not break easily along these lines. If you cover up those little white lines between each jewel, I can pretty much guarantee that they will shatter when you try to break them apart later. (See my results later in this post!)
Tips for hard candy cleanup
While you wait for the candy to set, let's talk about cleanup. That pan looks awful with the caked-on sugar, right? Fortunately, all you need to do is fill it up with water and let it sit a few hours. Go ahead and toss the thermometer and spoon inside, too. Don't even bother to scrub — it's not worth the effort! The sugar will all dissolve after a good soak.
Removing candies from the molds
After five or ten minutes, your candies will be set. Just flip the mold over onto the foil and give it a gentle bend.
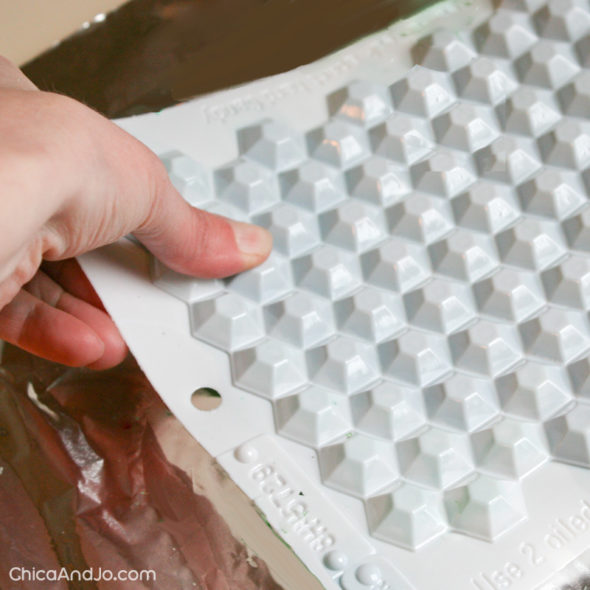
If you greased your mold well, the candies should pop right out.
You made candy!
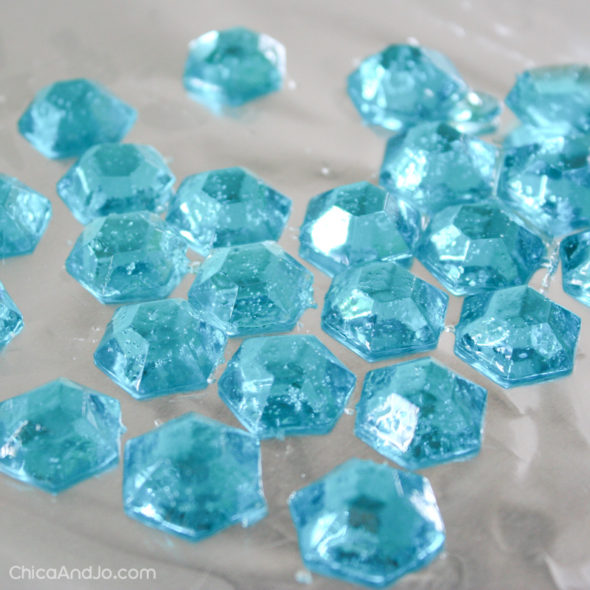
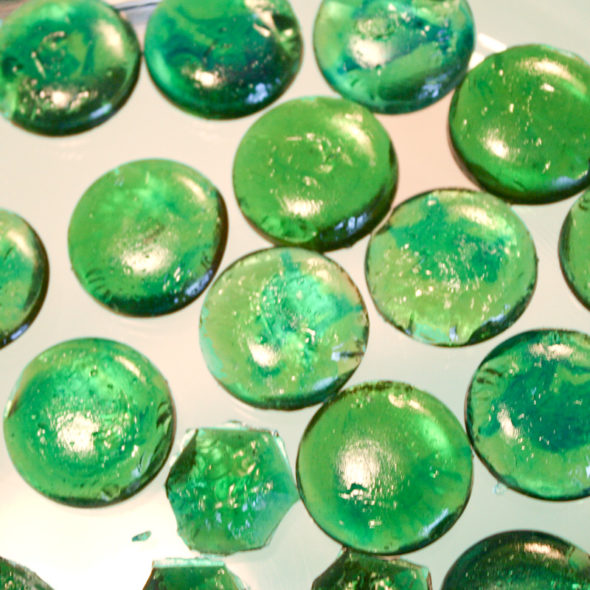
And that's it, your candy jewels are done! They will have a slight film of oil on them, which will help keep them from sticking together, but you can wipe that away with a paper towel if you want. As long as you store them in an air-tight container, they shouldn't stick at all.
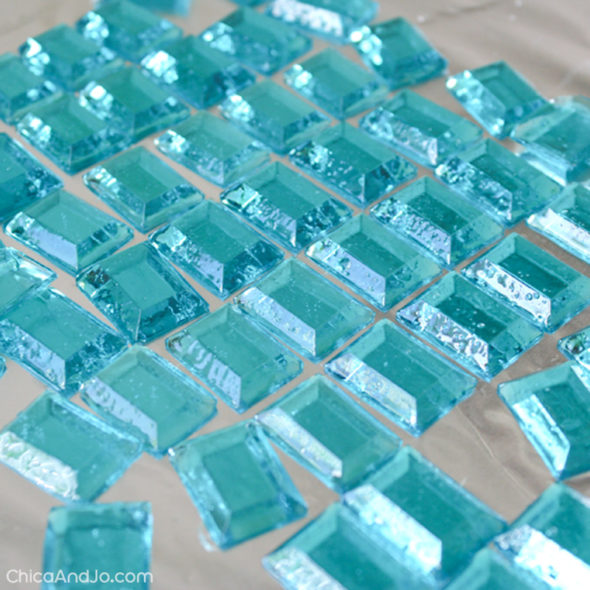
Can you believe we made these hard candy jewels out of basically just sugar? They are so beautiful it's hard to believe.
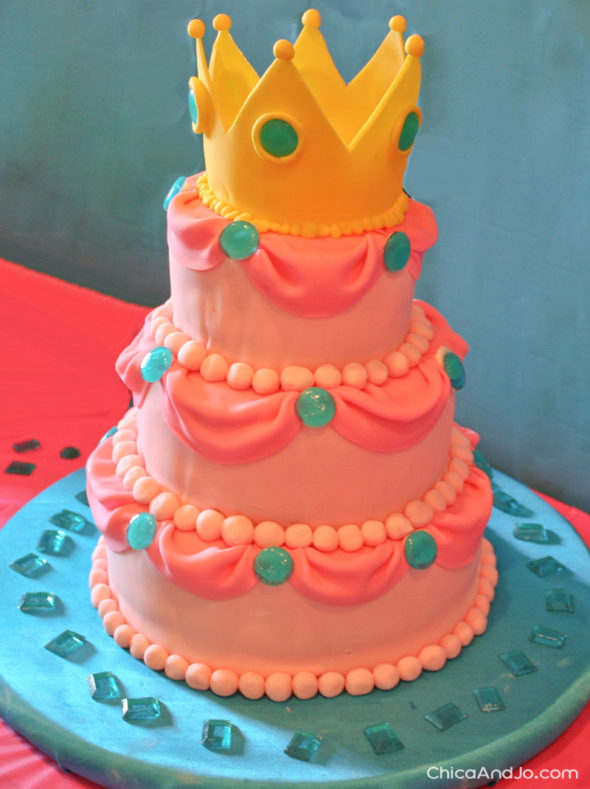
IDEA: Use candy jewels to decorate a cake
By now you're probably wondering what I ended up using these candy jewels for. They were the decoration on the Princess Peach birthday cake that I made for Little Jo's Super Mario Brothers themed birthday party. Don't you think they're the perfect touch?
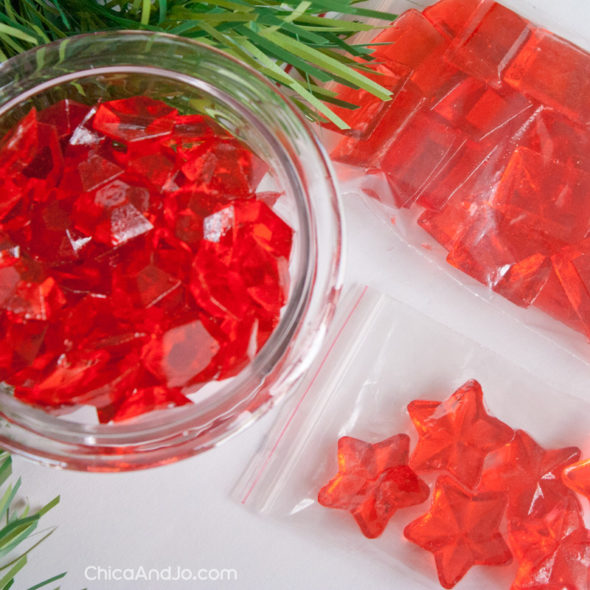
IDEA: Gift candy gifts at the holidays
I've also used this recipe to create cinnamon-flavored candies for Christmas, to give as little gifts to friends. I put some in bags and some in clear glass bowls, and they look so pretty.
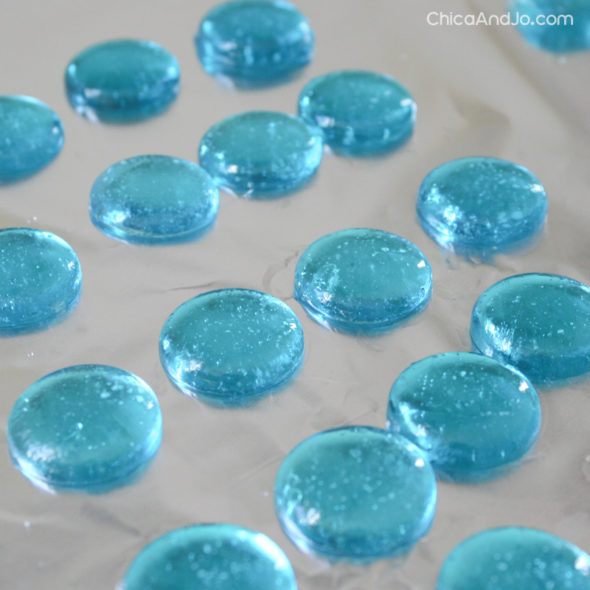
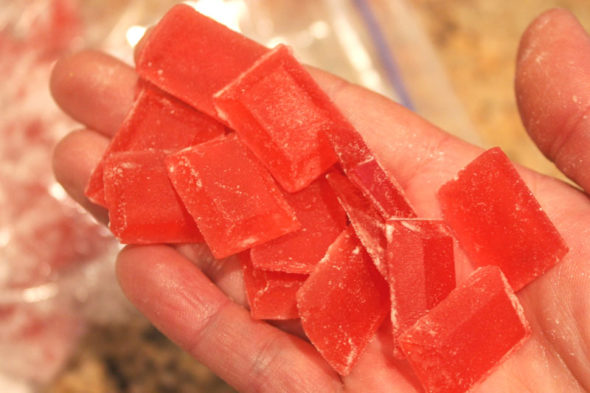
IDEA: Make frosted glass candies
The film of oil on the candies (leftover from the greased molds) should keep them from sticking together, but if you want to be extra sure your candies don't stick, you can toss them in a bag with a little bit of powdered sugar. Once you brush off the excess, you end up with candies that not only won't stick together, but that actually look like frosted glass!
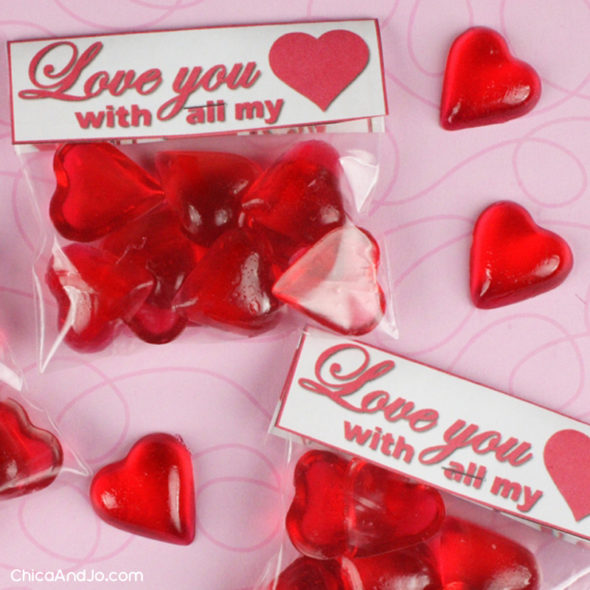
IDEA: Make candy hearts for Valentine's Day
I reached for this recipe again to make some heart-shaped candies for Valentine's Day. Be sure to check out my Valentine's Day heart shaped candy tutorial for more info, including our free downloadable bag tag. There's even a tip about making giant heart-shaped lollipops!
BONUS — Tips for making hard candy
Now that I've shown you how to make these candies the right way, let me share with you some lessons I learned while figuring it out. I hope seeing my mistakes will help you avoid them!
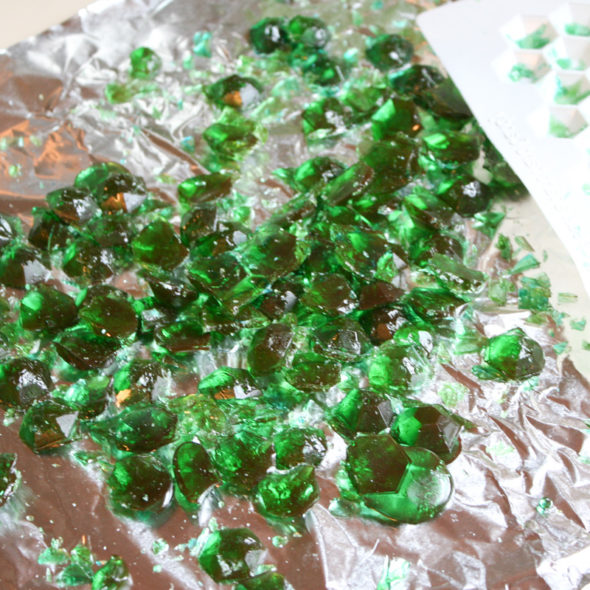
TIP #1 - Don't overfill the molds
Some hard candy molds are labeled as "breakaway" and you might think that you can just snap the candies apart when they are cool and everything will go great. That's what I thought, but turns out that is not the case at all. If you put too much candy in the molds, you'll end up with a huge slab of hard candy that breaks into every shape imaginable EXCEPT the one you were trying for!
When I tried breaking them apart on my first candy attempt, it was an absolute mess!
TIP #2 - Don't under-grease the molds
When I made my first batch of candy, I didn't have any non-stick cooking spray, so I tried to just wipe some oil onto the molds with a paper towel. The result was a film of oil that was no where near enough, and the candies stuck like crazy. Ugh! Make sure you grease your molds well.
TIP #3 - Don't overheat the syrup
You can get decent candies with varying temperatures, but for decent and true COLOR, you need to be sure you don't heat past 300 degrees. Having an accurate candy thermometer is critical to the success of this candy, so please make sure you calibrate it using the instructions I mentioned at the start of this tutorial.
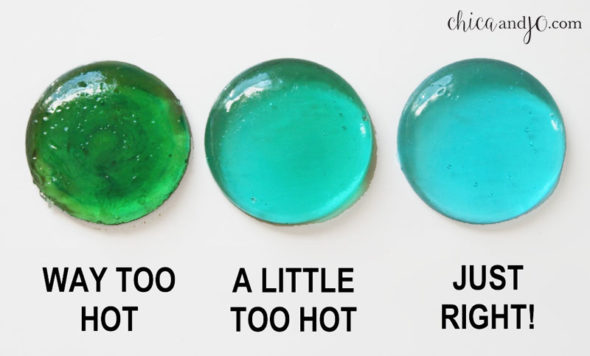
The first time I tried this candy, my thermometer was way off and I had no idea. My candy cooked way too long and the sugar started to caramelize. The syrup was yellowish by the time I added my blue food coloring, and the result was quite green! Then I tried again with a lower temperature, and it was still too much.
Then I finally figured out my thermometer was wrong, and when I adjusted for that, I hit the jackpot with true blue candies. Here's a picture of the three batches I made with the exact same amount of blue food coloring, but I let them cook to different temperatures. Can you believe the difference? If you want your colors true and bright, be sure your thermometer is accurate and don't cook it too long.
NOTE - Colors like red/orange/yellow are pretty easy, because a little extra caramelization won't mess it up, but if you're doing clear or blue candies, or you really want true colors with no golden tint, you might want to stop the temperature a little shy of 300 degrees. Stopping at 295 or 290 will keep your colors true, but you also run the risk of the candy not setting up hard enough. It's a very fine line, so you need to experiment to get the results you want.
TIP #4 - Have enough molds ready
There's nothing more frustrating with this project than having extra sugar syrup leftover with nowhere to put it. So make sure you pick up several hard candy molds. Three or four should work well for this recipe, depending on how big the cavities are. Make sure to prep all your molds so that you're ready for however far your syrup takes you.
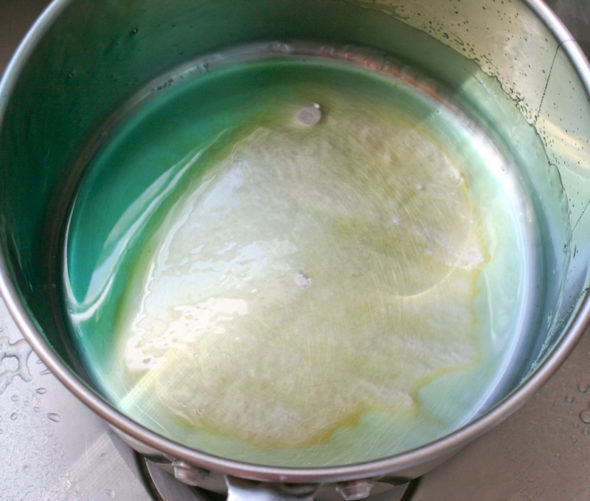
TIP #5 - Don't leave the syrup in the pan
As I mentioned earlier, you need to dump the syrup into another container when it has reached the proper temperature. Otherwise, the hot pan will continue to cook the syrup and you'll go over the target temperature and it will start to turn yellow. If you don't believe a few degrees will make that much of a difference, take a look at this picture of my pan. After I had dumped it out and made my candies, I went back and looked and the small amount of sugar left in the pan started to turn yellow just from sitting there. Discoloration like that will ruin a batch of candies fast!
TIP #6 - Don't give up!
If these lessons teach you anything, it's that mistakes happen. I went through several iterations before getting it right, and found that temperature was the most important factor. Keep at it and you'll get there!
![]()
![]()
similar projects
leave a comment:
Source: https://www.chicaandjo.com/make-hard-candy-jewels/
0 Response to "Best Day Ever Drops Funny Hard Candy Drops Metal Tin"
Post a Comment